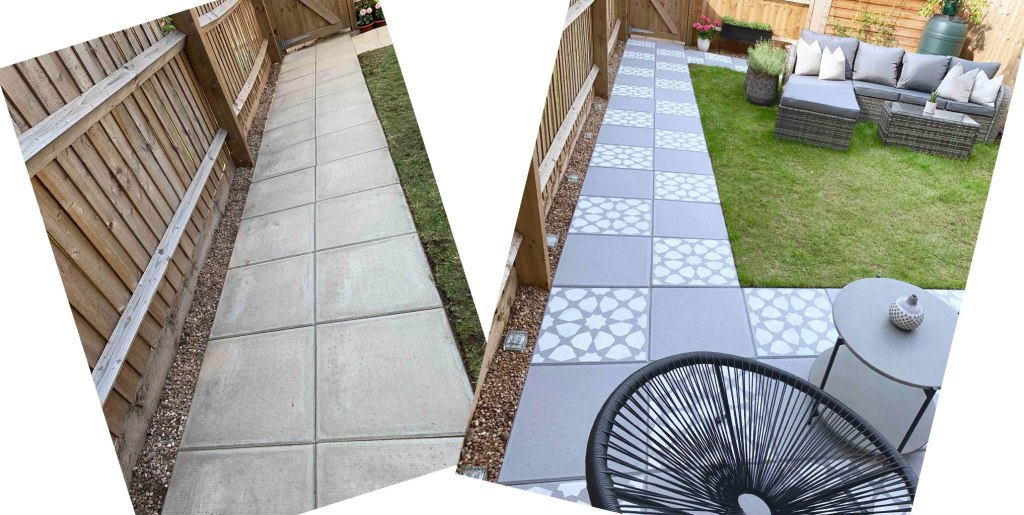
After moving into my first home just over a year ago, landscaping my garden was last on the bottom of my list. I wanted to find a way to transform my concrete patio garden slabs, by myself without having to pay for help or the expense of new slabs or landscaping. Sure, new concrete slabs with a design on already would be amazing but I didn’t have the time or budget, and I managed to find something way more unique.
I discovered a creative way to reinvent my VERY basic slabs into something really special. How? You may only think of stencilling when it comes to walls or cards and art, but you can in fact stencil garden paving slabs too!
The great thing about stencilling concrete paving slabs yourself is that you can go at your own pace, over as many days as you like. I managed to do mine over two days, and the hardest part was the prep before starting the stencilling. I’ve listed below what I used to prep, paint and apply and I recommend you don’t skip a section as you want your masonry paint to stay on and look great for as long as possible. (The concrete grey paint I have used below has a 15 year protection).
Stencilling on concrete is actually easy with the right tools and some patience. Below is step-by-step; how to stencil concrete garden paving slabs. Also the links to everything you’ll need, plus a video tutorial of me applying the stencil to my garden patio slabs.
Learn how to to stencil a pretty patio…
Step 1: Clean your slabs of any dirt, dust or residue. Making sure dirt and moss is completely cleared in between you slabs. Picture and link to tools below.


Here’s The link the wire brush you’ll need, click here.
Step 2: If you have grass running along the side of your slabs, make sure you clear a small gap so no grass or mud is touching the slabs. You won’t be able to neatly stencil if anything is touching the slabs. (Pic of what I did below).


Step 3: It’s time to apply the base paint to your slabs. I used two brushes to apply the paint, one large for the main area and one thin for the gaps and edges. Some tutorials use a roller but I feared it may go everywhere. Depends on how your garden is laid out and if there is anything in close proximity.
Here’s the link to the GREY PAINT I USED, click here. It’s weather shield with a guarantee, so it should last!
Here’s the link to the larger BLOCK PAINT BRUSH, click here.
Here’s the link to the thin precision tip paint brush, click here.


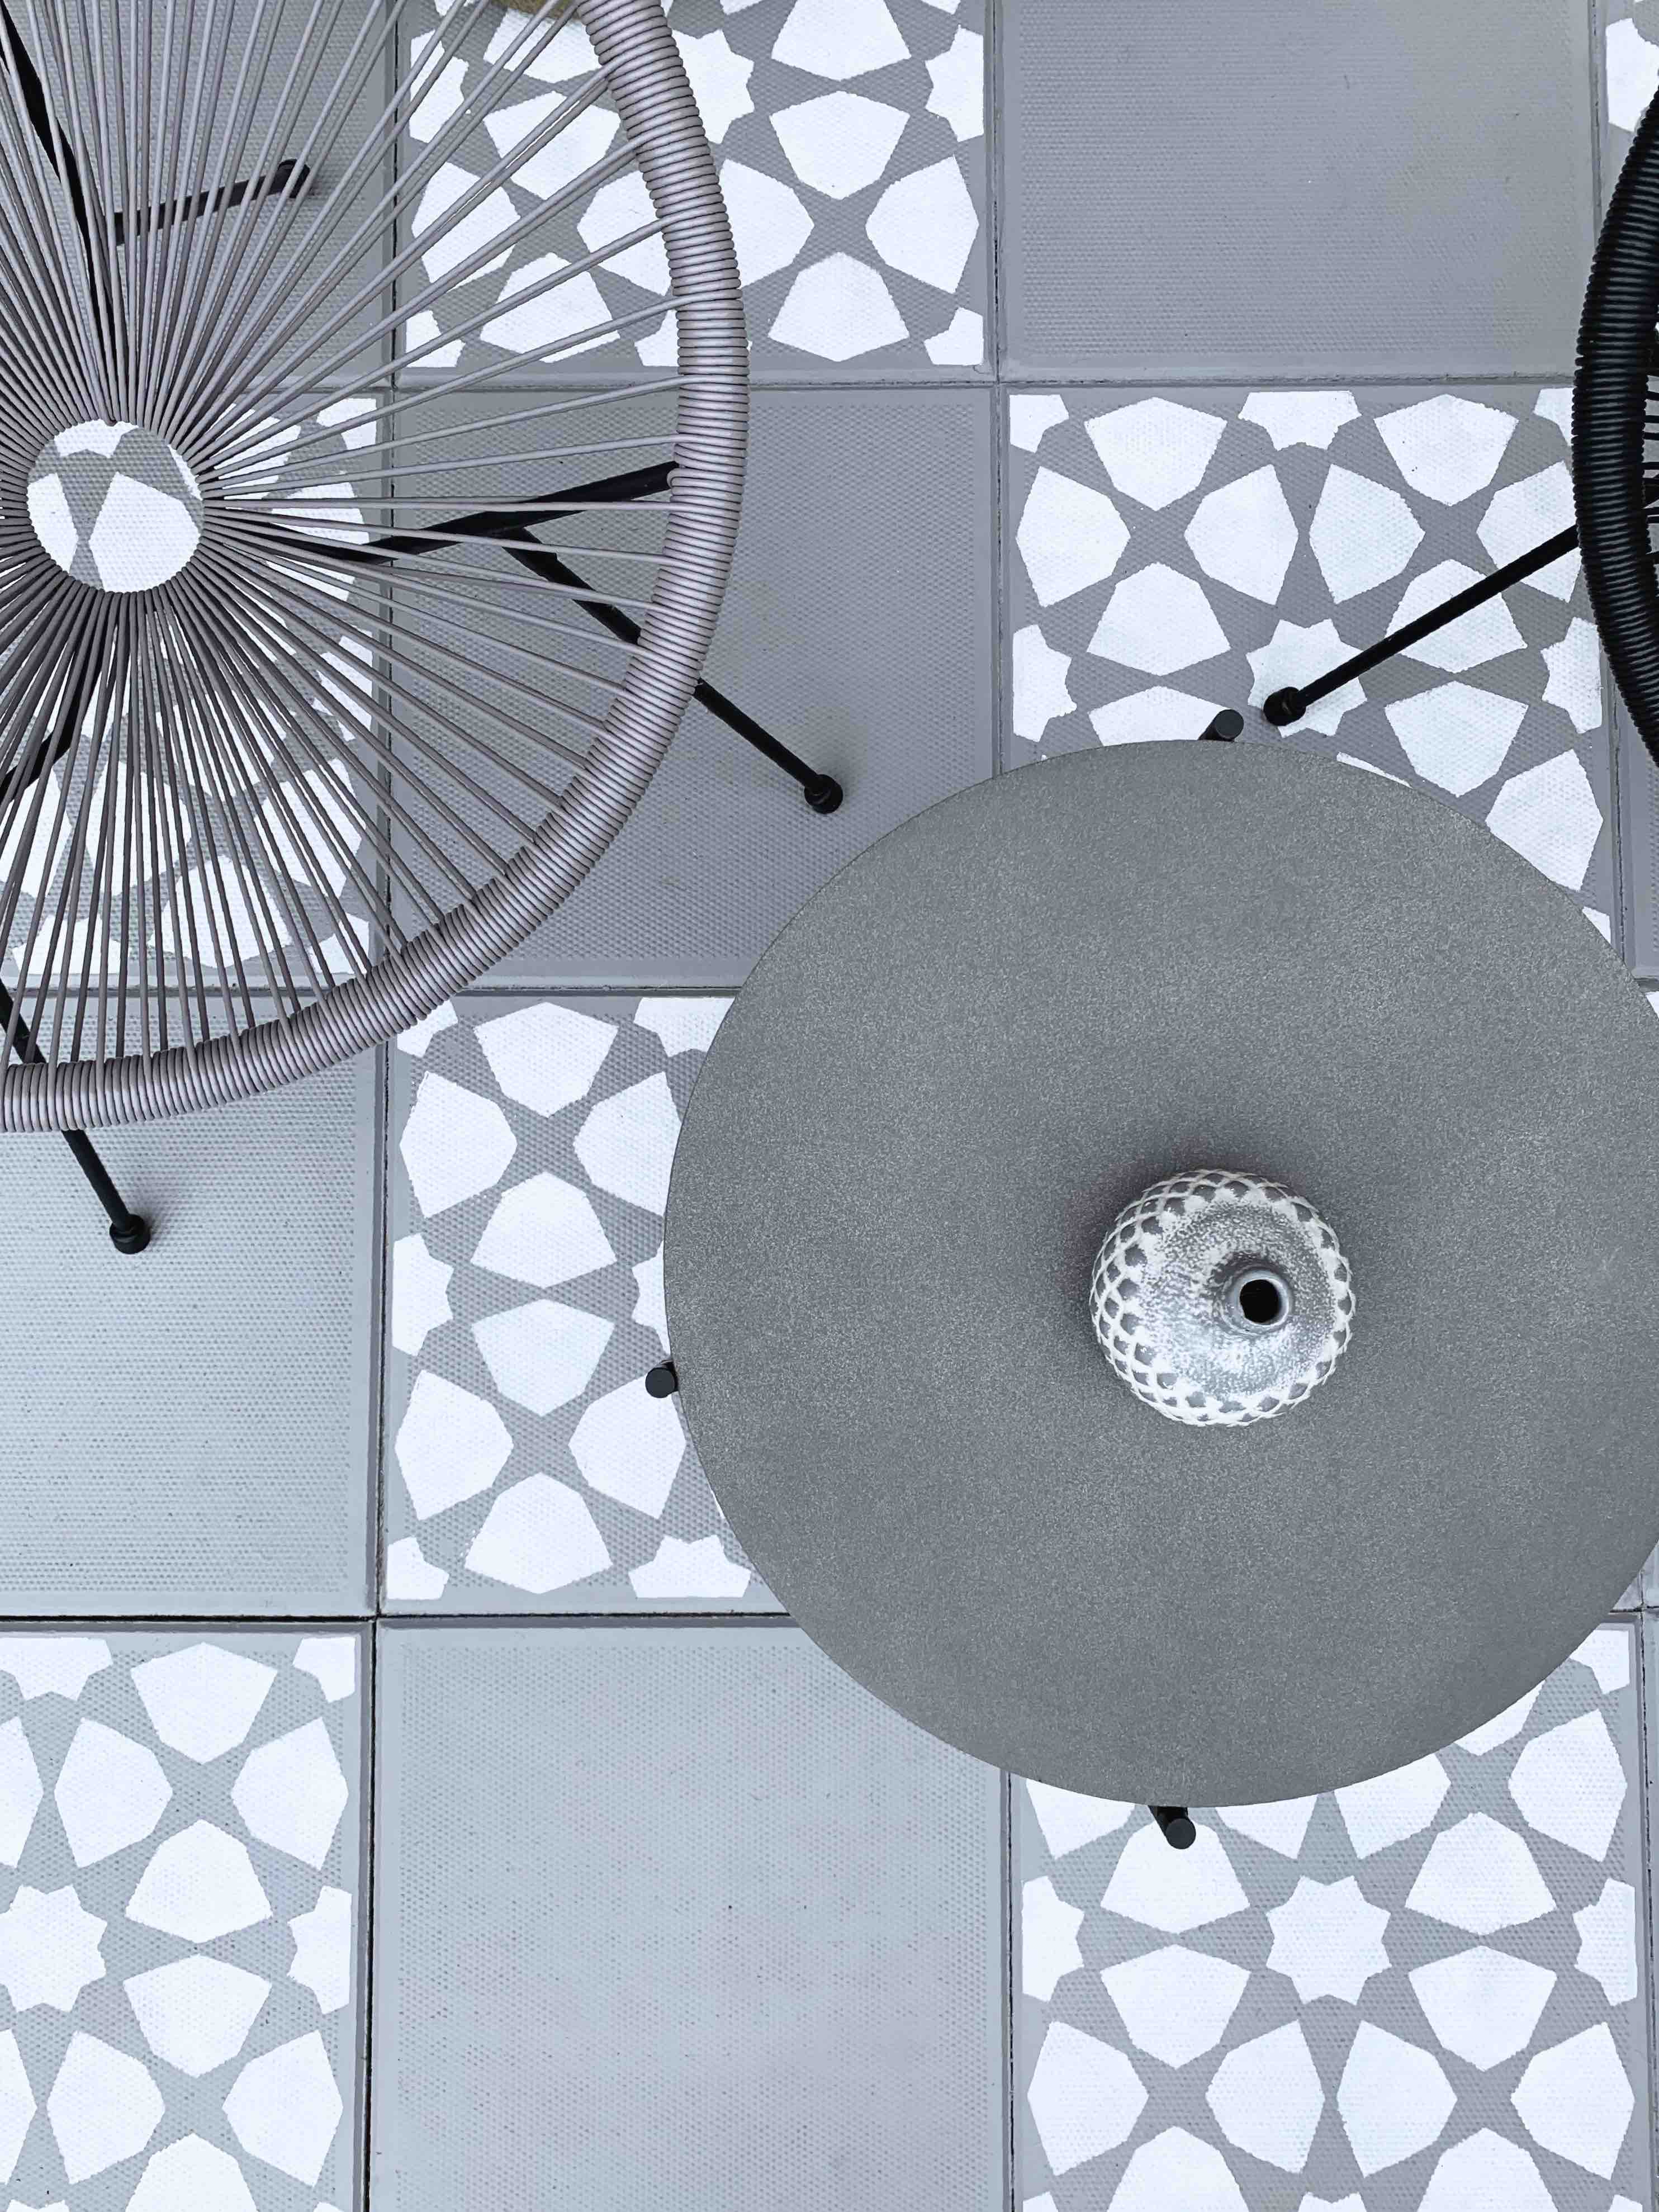
Step 4: Once the concrete masonry paint is dry, it’s time to stencil the patio paving slabs. I used Dizzy Duck Designs stencil. Keeping the stencil in place with some Frog Tape and you’re ready to start.
As you will see in the video tutorial below, the brush needs to be really dry of paint. Use an old piece of cardboard to dab any excess and work the brush into the stencil in circular motions to the centre of each gap. Dab the edges and don’t brush outwards as the paint may bleed. If there’s anyway you can test this before on something, as the bush needs to be practically dry.
Link to the Dizzy Duck Designs stencil I used, click here.
Link to the Brilliant White Masonry Stencil Paint, click here.


Step 5: Once the first stencil is complete repeat onto the next. I advise waiting a minute in-between each placement as there can be a little paint residue on the stencil. Once complete, leave to dry overnight.
(I haven’t yet protected my patio slabs, but I may in the next few weeks. B&Q have some masonry paint protectors.)
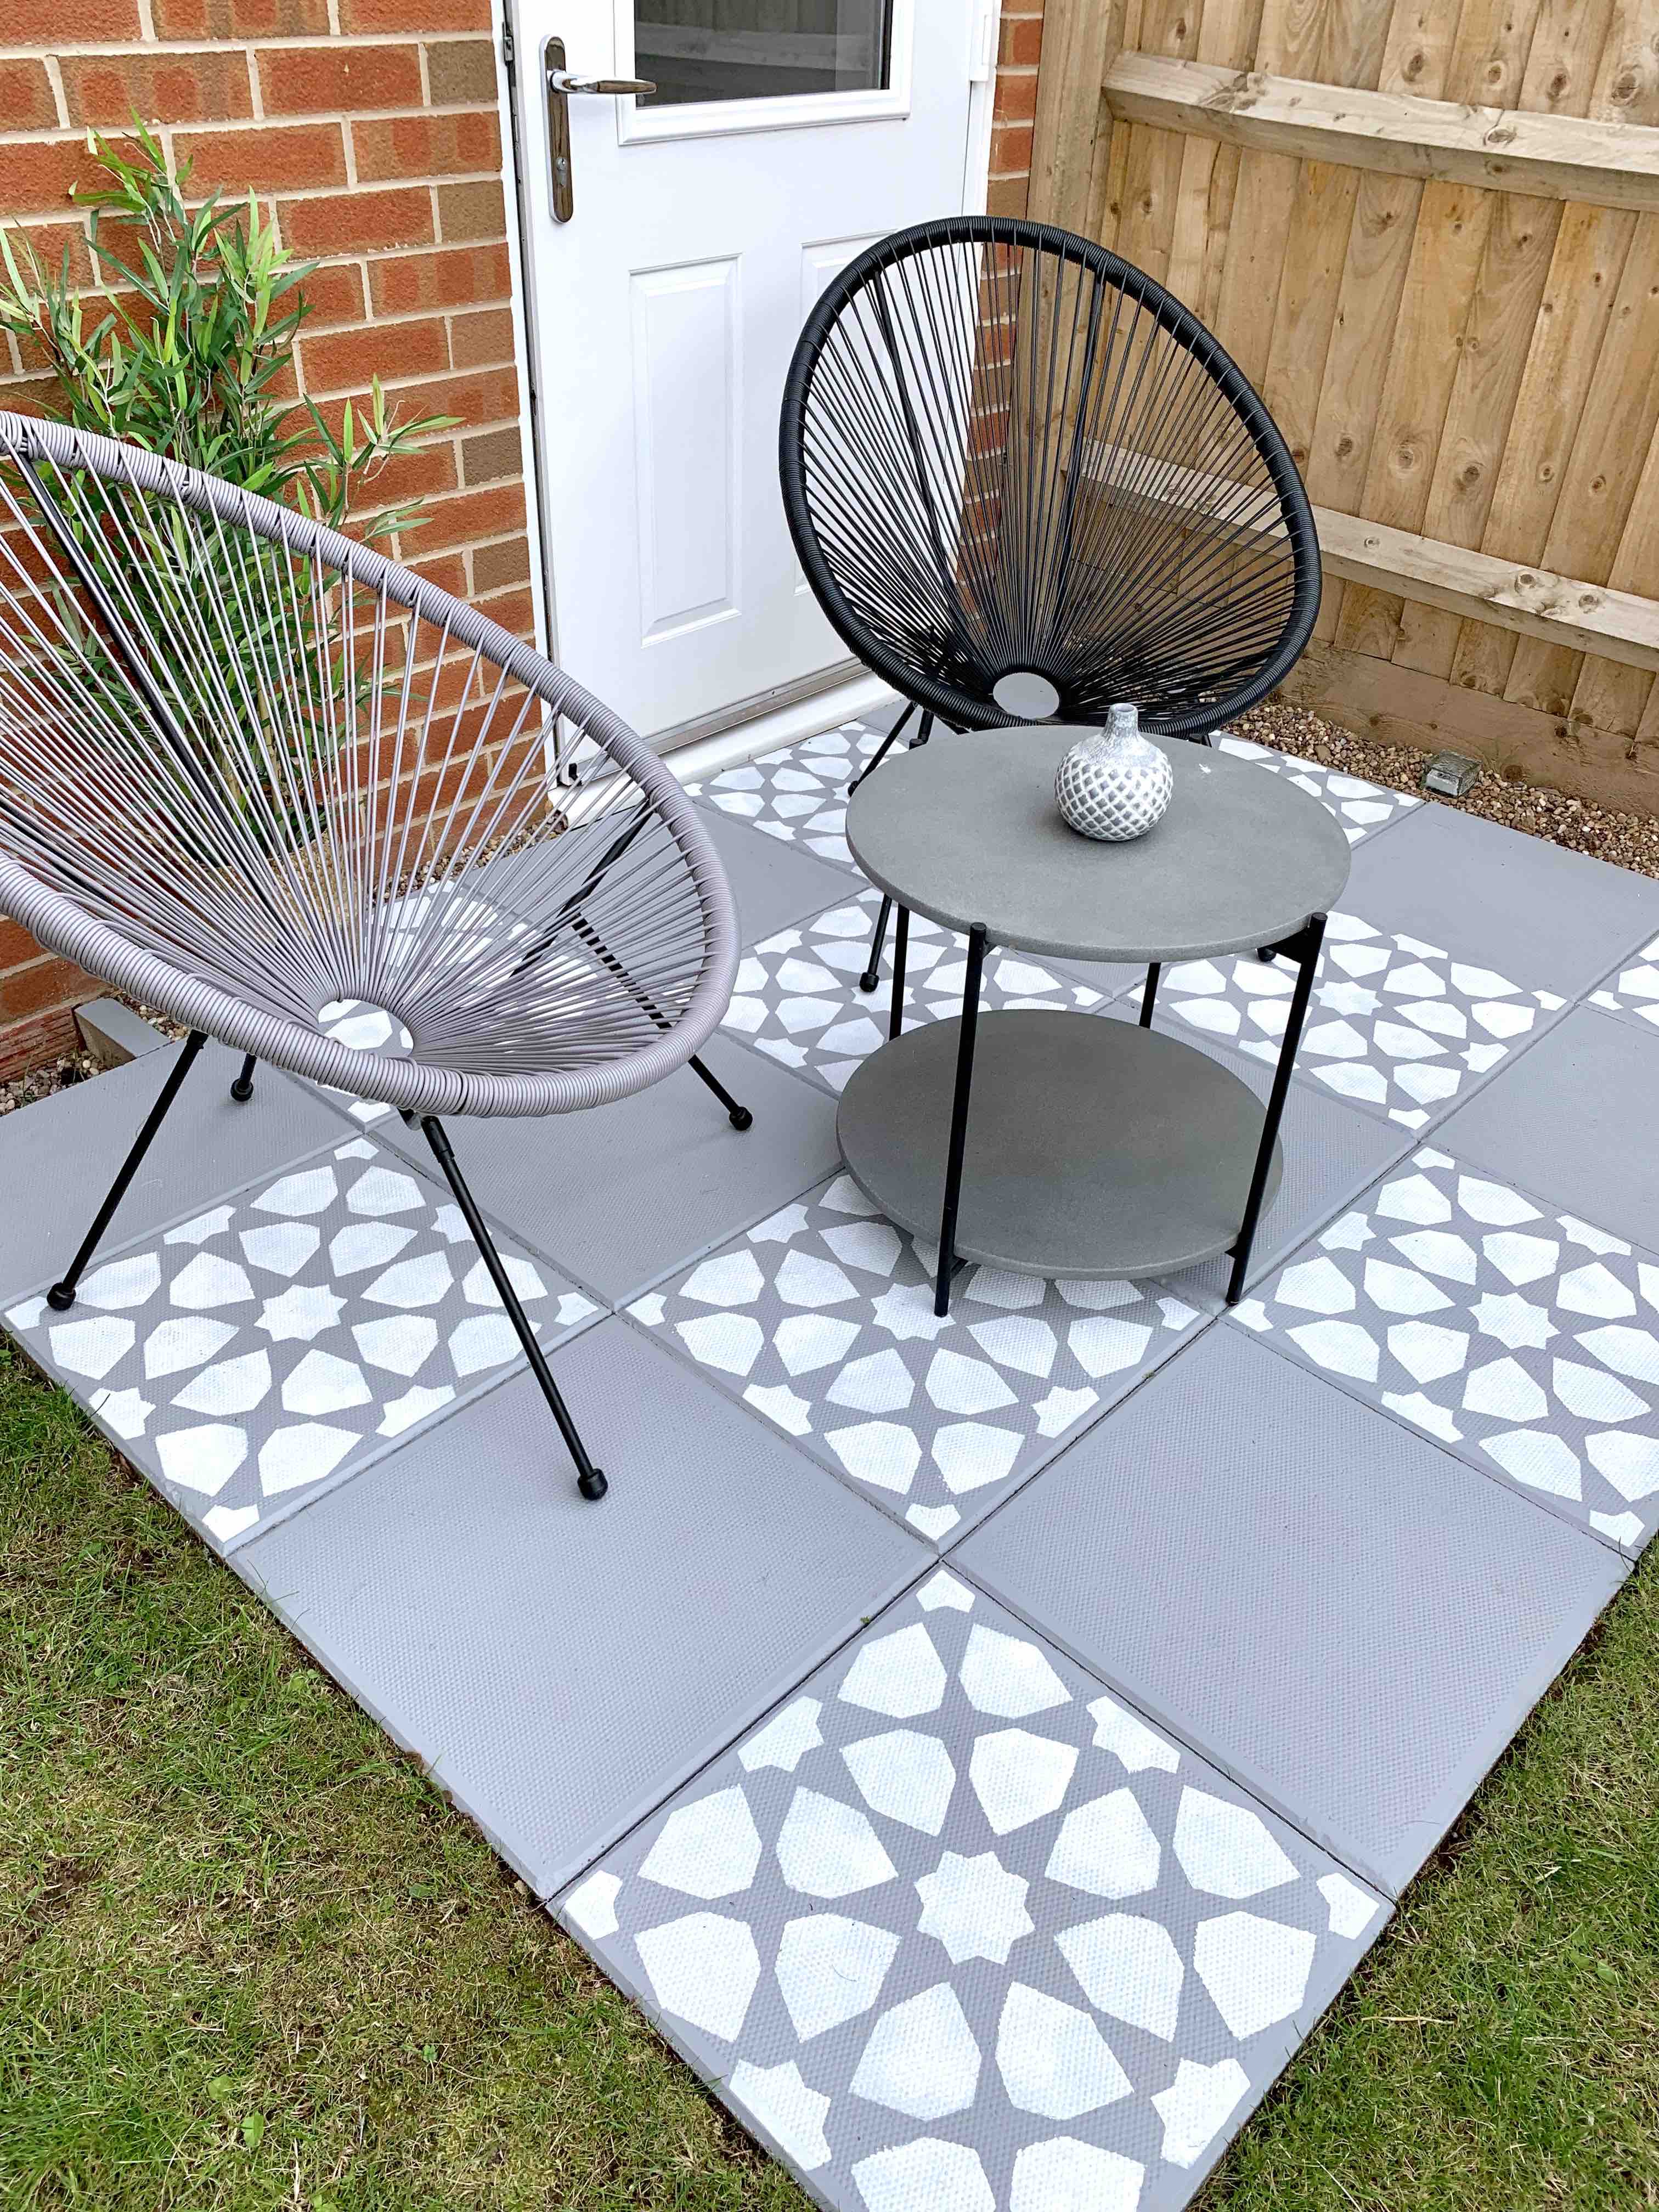
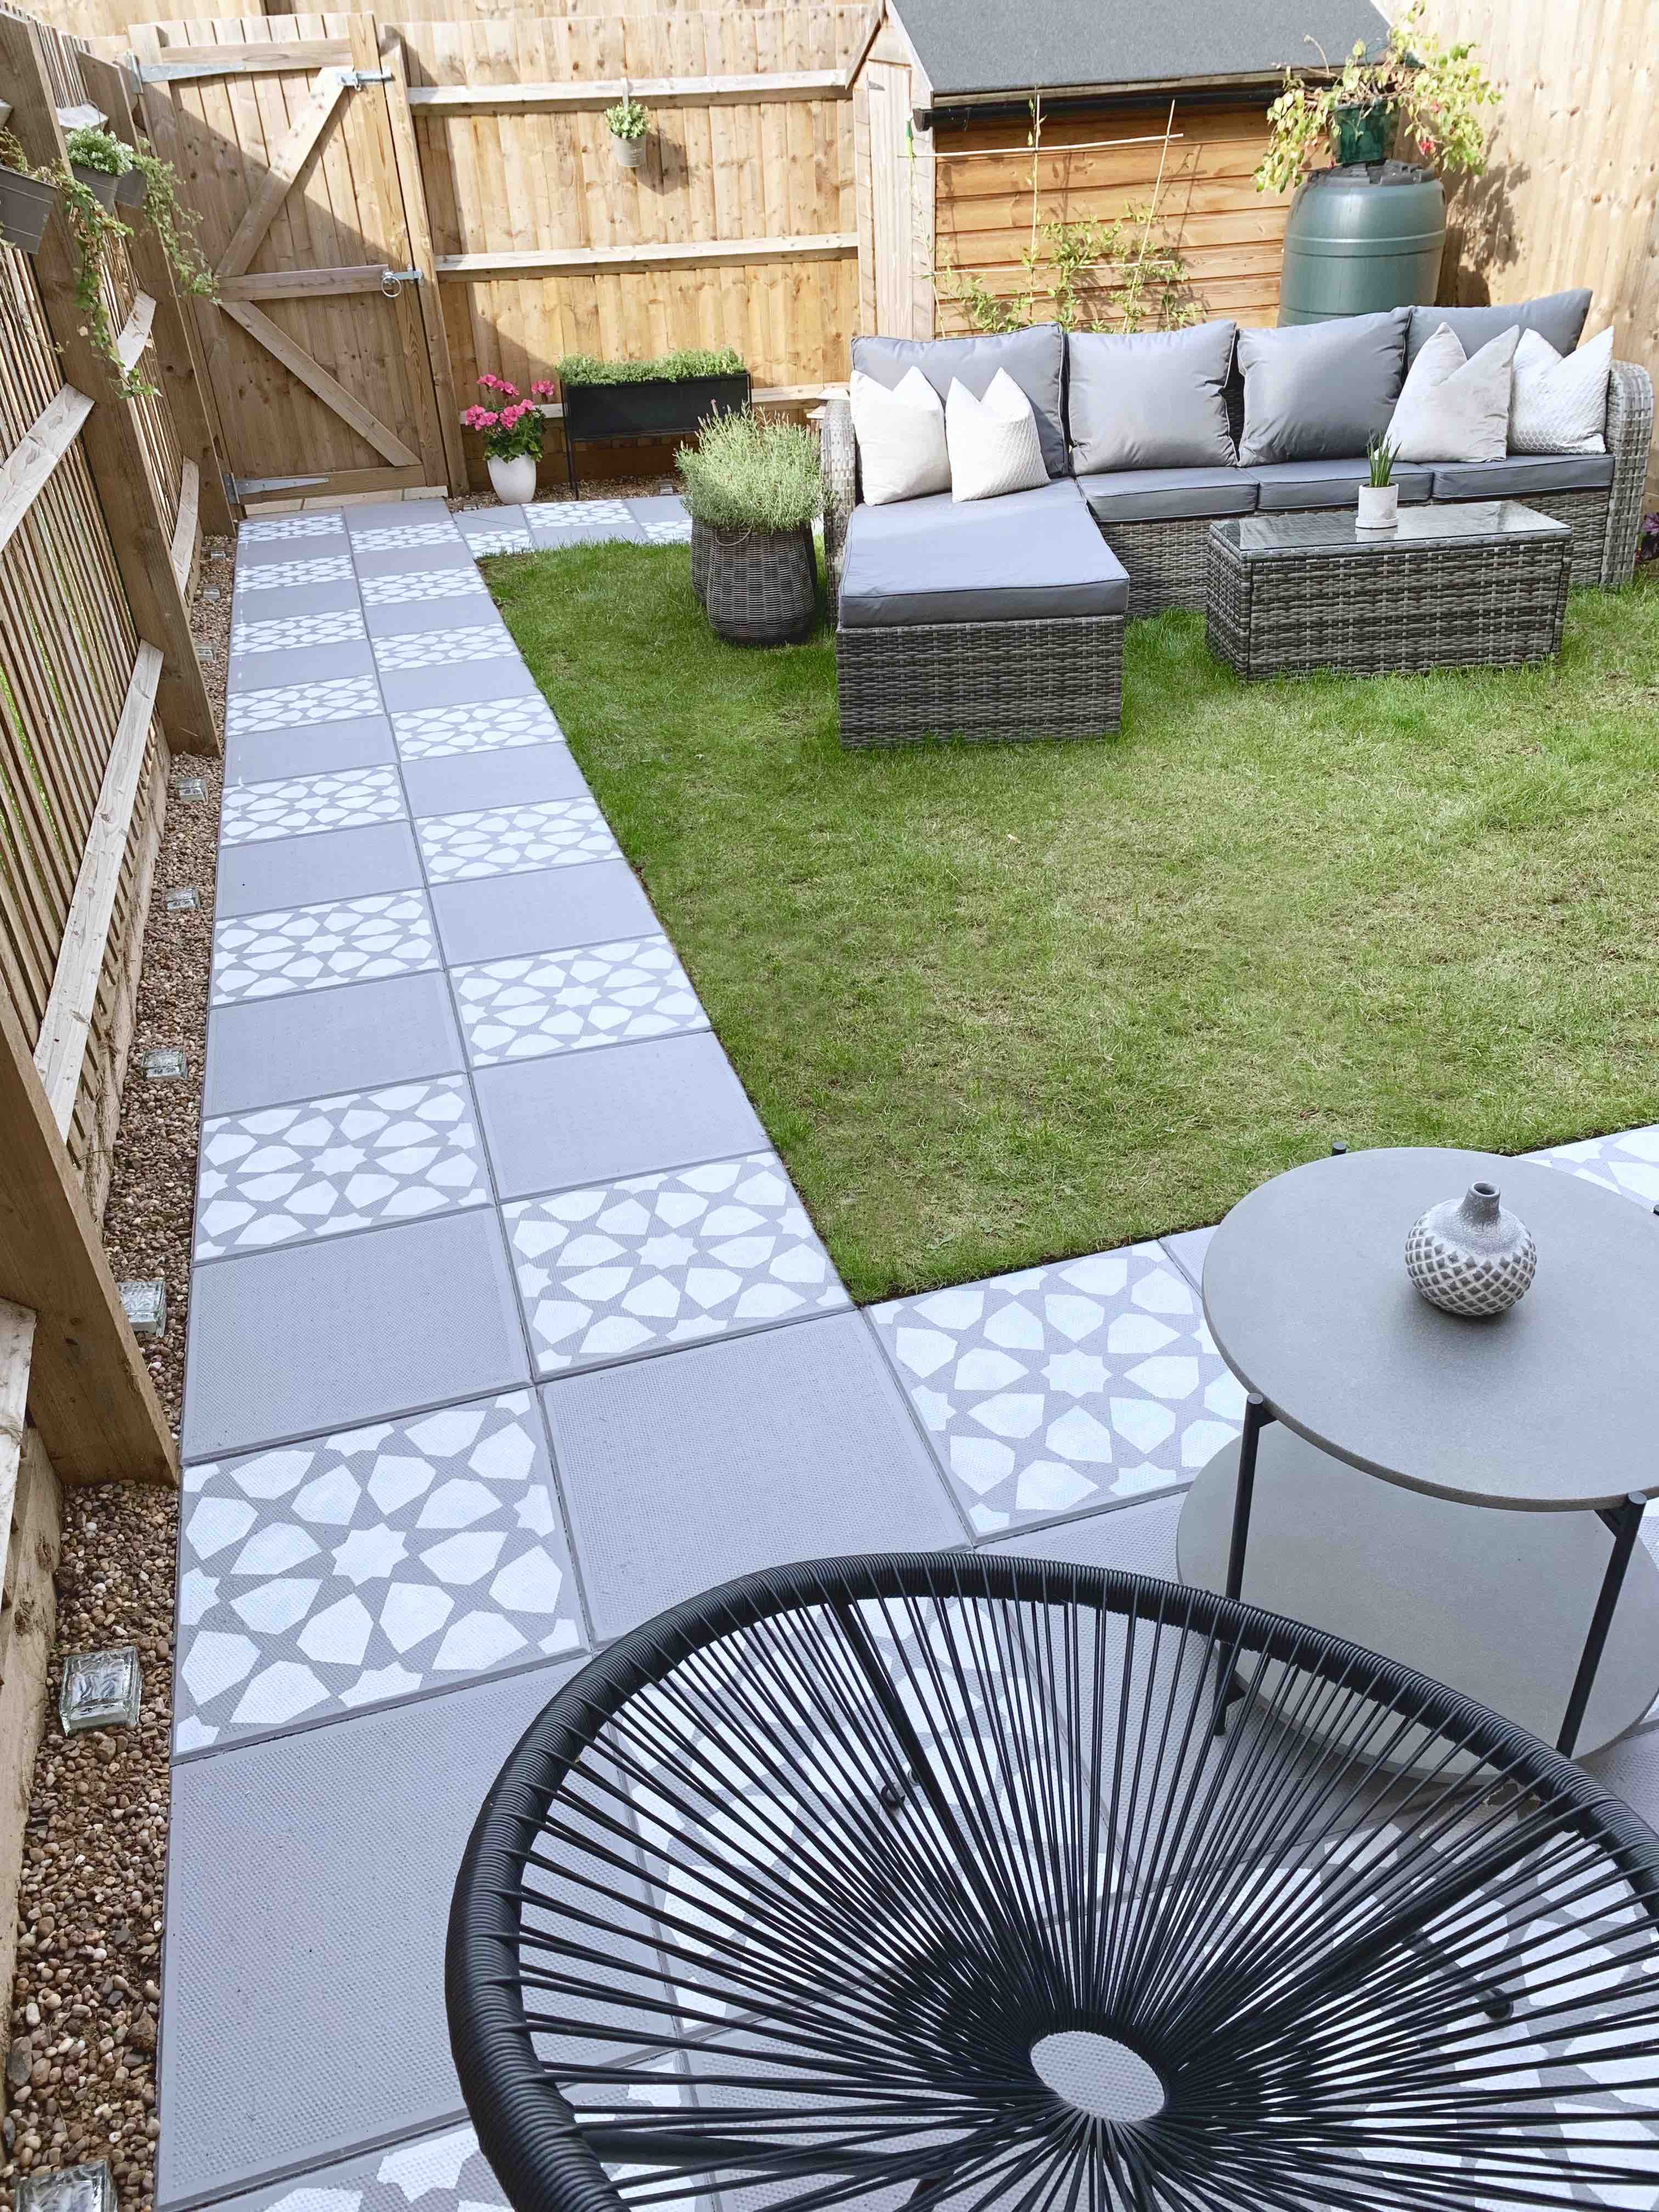
Below are some images of my concrete slabs TRANSFORMED. I’m SO HAPPY with the result, the garden looks like new.
If you’d like to watch how I stencilled the concrete patio slabs, you can watch my YouTube video tutorial here.
You’ll see in one of the images below, I have placed some cute cube solar lights along the edge of the path, which look FANTASTIC at night. Literally lights the whole garden up. Here’s a link to solar lights from Festive Lights Ltd, click here.
Here’s the YouTube tutorial “how to stencil concrete garden paving slabs” –
If you try this out in your own garden, I’d love to see how you get on. Please follow me on instagram – www.instagram.com/home.ideology and please subscribe to my YouTube channel above for all my latest DIY projects.
Comments and questions on this blog are welcome and I shall respond as soon as possible.
Thanks for stopping by and happy stencilling 🙂
Lydia xxx

Leave a comment